Printing in the Workbench
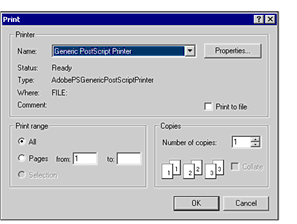
In addition to source code files and other text documents, AcuBench's print function allows you to print hard copies of screen forms, report forms, and the contents of the Output window. Select File > Print or click the Print icon on the Standard toolbar. This opens a standard Windows print dialog that allows you to select a printer, specify a page range, and so on.

Use the AcuBench File > Print Setup command to change printers, select an output tray, change paper orientation, and so on. Like the Print dialog, the Print Setup dialog is a standard Windows interface.
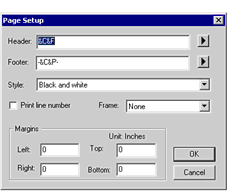
When you print a text file, rather than a screen or report form, you can use the File > Page Setup command to customize the appearance of the printed page, including the header and footer, if any. This command opens a Page Setup dialog box that also allows you to specify a page style, margin sizes, and other options.

The Header and Footer fields of the of the Page Setup dialog box can take a text string or any of the special options described in the following table. You can either manually enter the code for any of the special options, or click the arrow button to the right of the field and select an option from the pop-up list.
| Option | Description |
|---|---|
| Full Path Filename
&U |
Prints the full path and file name in the header or footer |
|
Filename
&F |
Prints the file name in the header or footer |
|
Page Number
&P |
Prints the page number in the header or footer |
|
Current Time
&T |
Prints the time the document was printed in the header or footer |
|
Current Date
&D |
Prints the date the document was printed in the header or footer |
|
Left Align
&L |
Prints the header in a left alignment or footer |
|
Center
&C |
Prints the header in a center alignment or footer |
|
Right Align
&R |
Prints the header in a right alignment or footer |
You can also set the following additional options to determine the appearance of your print output:
| Option | Description |
|---|---|
| Style | Select any of the following styles from the drop-down list:
Black and White prints your document in black and white. Color prints your document in color. Zebra prints your document using alternating gray and white stripes. |
| Print line number | Check this check box if you want the line numbers of your file to print on your document. |
| Frame | Click None if you do not want to print a frame around your document, or Inner to print a simple, single-line box around each page of text. |
| Margins | Allows you to specify margin settings for your printed document. Set the left, right, top, and bottom margins in measurements of inches. |