Establishing Report and Control Defaults
When you work in the AcuBench Report Composer, each element of the report (the report itself, each report section, and each report control) is associated with properties that appear in a Property window. You can determine the default setting for each of these properties and specify whether each property appears in the Property window. To enforce certain default settings, you could, for example, set the property default, then hide those properties in the Property window, causing the default property to always be used.
You can set the default properties and determine whether or not the property appears in the Property window through the Tools > Options interface.
To set default properties for report elements:
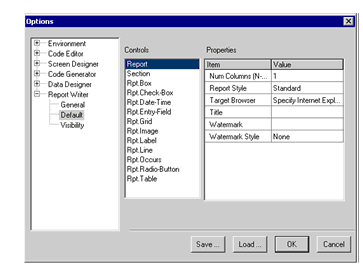
- Open the Tools > Options interface, expand the Report Writer tree, and click Default.

- Click a report element from the Controls list. The properties corresponding to the selected element appear in the Properties list on the right.
- Scroll through the Properties list to view the available properties and their default settings. To change a setting, click in the Value column next to the property name and enter your change.
In some cases, a drop-down list and/or push button may appear when you click in the Value column for a report element. In this case, you can select an item from a list or click the button to open a secondary interface to define the property setting.
The result of any change to a report element's defaults is reflected in the Property window each time you create a new element of that type.
To determine which properties appear in the Property window when you work in the Report Composer interface, do the following:
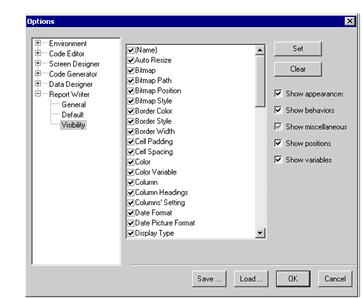
- In the Tools > Options interface, expand the Report Writer tree and click Visibility.

- To remove an individual property from the Property window, uncheck the check box next to the property name in the large list box. To show the property in the Property window, check the check box.
You can also click one or more items in the list, then use the Set and Clear buttons to add or remove properties from the Property window.
- To remove an entire category of properties from the Property window, uncheck any of the Show check boxes (under the Set and Clear buttons).
If you have removed a category from the Property window, you can add it back by checking the corresponding check box. Each property belongs to only one category.